Sunday, July 31, 2011

Sunset in my teapot.


Went to the grocery store today to pick up some ingredients for peach cobbler.

Spotted some beautiful flowers for $4.00 a bundle.

Told Scott to go get the flour and sugar because I had other things to browse.

I picked a yellow bundle, an orange bundle, and a purple bundle.

And now I have a little sunset in my teapot :)


It was all yellow,

HK

Saturday, July 30, 2011

Peach-Raspberry Sherbet


I have so many fond memories attached to peaches, specifically the peach tree that grew in the front yard of my parents' house. We climbed it, we hung upside down from it, we picked gobs of peaches from it, we ate gobs of peaches from it, my mom made AMAZING peach butter from it...

Peaches are the reason I love Texas summers despite the horrendous heat. Their soft, fuzzy shell; their juicy, sweet inside; their fresh, warm smell. Unfortunately, we no longer have the peach tree (it died), so instead I look forward to when HEB advertises "Texas Peaches $1.99/lb" You can bet I hop directly into my Toyota, drive to HEB, and fill my cart with pounds of Texas peaches!

If you have the self-control to not eat all of the peaches in one sitting, there are SO many tasty treats to create from peaches:

cobbler
jam
butter
preserves
chutney
pie
cake
cupcakes
ice cream
sherbet

Due to the rising temperatures in Houston as we quickly approach August, I thought it would be a good idea absolutely necessary to make peach sorbet.

This recipe is slightly adapted from a recipe in the food magazine, "Cuisine At Home" titled "Sparkling Peach Sherbet".

What you need:
-1 cup sugar
-1/3 cup raspberry sparkling wine**
- 1/4 cup honey
-2 pounds fresh peaches
-1 teaspoon fresh lemon juice
-1 cup plain yogurt

**I used raspberry sparkling wine instead of the club soda originally specified in the recipe

What to do:
-Heat the sugar, sparkling wine, and honey in a saucepan over high, stirring until sugar has dissolved. Chill mixture until cold. I put mine in the refrigerator to speed up the process.
-Bring a large pot of water to a boil. Score an "X" on the bottom of each peach. Blanch the peaches in the boiling water for about 30 seconds, then transfer them into a large bowl of ice water to shock.
-Peel skin off of the peaches and cut in half, removing the pits. Puree peaches in a food processor.** Stir in lemon juice and chill until cold.
-Whisk yogurt and chilled sugar syrup into chilled peach puree.
-Transfer sherbet mixture to a 1-2 quart ice cream machine. Process sherbet for about 30 min, then transfer sherbet into a freezer container and freeze for 3 to 4 hours.

**Cuisine At Home recommended passing the puree through a fine mesh strainer. I omitted this step because I liked the texture of the peaches.


Outfit :: All American Aztec


It was surprisingly not unbearably hot this morning here in Houston. "Not unbearably" meaning that it was 88 degrees at 10:00am instead of 93 degrees. BUT, that 5 degree difference was enough to put me in a sundress and walk down to the Museum District with my hubby!


We slowly meandered down the sidewalks until we reached the Contemporary Arts Museum, which I had never visited before.


We decided to take the outfit photos at the museum, after we had been walking in said 88 degree heat for 20 minutes. Good backdrop. Bad idea. I was drenched in sweat by the time we got there from head-to-toe. We took a break to sit on a concrete bench right after taking the photos and I'll just say that when I stood up, there was a dark spot in the shape of my thighs when I stood up, and my dress was awkwardly plastered to my tush. Pardon me, while I peel my dress off my bum...

Scott snapped this photo as I was directing him via air-traffic-control-person-hand-signal to take the photo in front of me. Follow directions, babe! ;)

Dress :: Forever 21
Belt :: Forever 21
Sandals :: Marshalls (gift)
Earrings :: gift
Necklace :: combination of charms from prior purchases
Headband :: no idea. had it for years!
Sunglasses :: Forever 21
Purse :: Target

Hot sun shining in my face,

HK

P.S. I FINALLY figured out how to make my photos bigger on Blogger! Woohoo!

Friday, July 29, 2011

Fabric Bookshelves


If you will remember, my mom came to Houston back in May to help us fix up our apartment. We painted and painted and painted some more! Our apartment was really starting to feel like home when she left, but I still had a few projects left on my list to "complete" our digs.

Scott and I decided that this week would be our week of ultimate productivity. We were going to tackle these projects one by one until all most of those projects were struck off our list! I must say, we accomplished a lot these past few days.
Among my list of projects:

.paint wall shelves in our bedroom
.paint lamp stands in our bedroom
.paint side tables in our bedroom
.put fabric on the bookshelves in the living room
.spray paint antique window with chalk paint

As you can see, the only thing I lack is putting chalk-paint on an antique window. Another day.

I have been pleased with how each of these projects have turned out, but I am the most squirrely (excited) about how the fabric on the bookshelves looks!! It took lots of time, cutting, ironing, gluing, more gluing, more cutting, but it's done and I think it looks pretty swell!

This project is perfect for those of you who are renting and are not allowed to paint anything in the apartment. The fabric is applied to the walls in such a way that it can be peeled off when you have to move, or if you're just tired of the way it looks. We are lucky enough to be able to paint, but I just liked the idea of fabric vs. paint for our little bookshelves.

What you need:


-fabric
-fabric scissors and/or rotary cutter with cutting board
-liquid or spray starch **this was an EPIC fail when I tried it... I followed the internet instructions, but the fabric just would NOT stick.
It's possible that the fabric would not adhere to the starch because there are layers and layers of paint on the bookshelves, creating a slick surface. ANYWHO, Mod Podge worked SO MUCH better!**
-Mod Podge, a.k.a. magic gluey stuff that adheres anything to everything and dries clear. I. love. this. goop.
-large paint brush
-small bowl
-jelly roll pan (fancy name for a cookie sheet with a raised rim on the sides)
-water
-straight edge
-exacto knife
-iron & ironing board
-tape measure

What to do (these instructions are for applying fabric to one part of the shelf, repeat steps for all other shelves.):
-Using a tape measure, measure the back wall of your bookshelf.
-Cut your fabric so that it measures 1" longer than the shelf dimensions on all sides. For example, if your shelf measures 24"X14", cut your fabric to 26"X16". Iron out any wrinkles, if necessary.
-Fill the small bowl with water and place it on the inside of the jelly roll pan, so as to prevent spillage onto the floor
-Pour a decent amount of Mod Podge into the jelly roll pan
-Using a large brush, wet the brush in the water, then apply a thin coat of Mod Podge to the back surface of the shelf, making sure to apply Mod Podge into the corners and edges of the surface


-While the Mod Podge on the shelf is becoming slightly dry and tacky, coat the back of one fabric piece with Mod Podge, making sure to leave a 1/2" un-Podged around the perimeter


-Place the fabric piece on the shelf, leaving the 1" of extra fabric around the perimeter
-Using a straight edge, smooth the fabric over the surface to remove any bumps and air bubbles


-Once the Mod Podge has dried, take an exacto knife and trim off the excess fabric, using a straight edge to guide your cut
-Repeat the above steps to complete your shelves!

BEFORE:


AFTER:


I have a confession to make. My abilities in trimming the fabric were not stellar. My knife was not very sharp, so I had several places where the edges were jagged... But! Have no fear! You can cover these places with carefully placed objects...

You can't even tell, can you...?


With sticky Mod Podge fingers,

HK

Saturday, July 16, 2011

Houston.

Well, we are back! Two weeks earlier than planned, but when you travel for a while you quickly learn that plans change under your feet; change, in fact, is the norm.

You might have guessed that because we are back so early, we did not end up going to Guatemala. It was going to cost us $300 to get there and back, and we were only going to be able to visit for 5 days. Which, for the amount of travel just didn't seem worth it. So, we used the $300 to change our flight for Tuesday, July 19th.

Yes, it is Sunday, July 16th, and I promise you that I am sitting in my apartment in Houston :) The youth group that we were working with for the past week ended up having to come back to Houston today, and Scott and I didn't really want to spend 3 days hanging around Managua, so we decided to fly back with them!

It's so nice to be back home, but the longer we sit in our apartment, the more I start to miss Nicaragua. Things as simple as being able to throw my toilet paper in the toilet and not into a trash can have been an adjustment. Maybe this is TMI, but after my first use of a toilet on American soil, which was in our apartment, I held the toilet paper looking for the trash can to throw it in. Then, I found the trash can and noticed that it didn't have a trash bag in it. My first thought was NOT, surprisingly, "Oh wait, dummy, you can just throw it in the toilet because you are back in America." No, my FIRST thought was, "Shoot, why is there not a bag in the trash can? Now I am going to have to throw it there without a bag, flush, go get a bag, fish out my nasty toilet paper, then put it back in the bag." Yes, all of that ran through my head before THEN I realized that I was in America and could thus throw the toilet paper in the toilet and flush it down. And even after realizing that, I hesitated before flushing. It's amazing the things that you find SO strange when you go to another country that quickly just become routine.

Scott and I drove to Goode Company barbecue for dinner tonight (I mean, what better meal to welcome us back to Texas?), and as we were driving I was expecting our car to be approached by Nicaraguans selling cashews and bubble gum on the street. But, no. It was a quiet drive. Absent of hundreds of people walking in the middle of the street approaching our car. I even found myself somewhat missing the hundreds of flies swarming our arms, faces, and food as we ate dinner. Emphasis on somewhat... I don't really miss the flies.

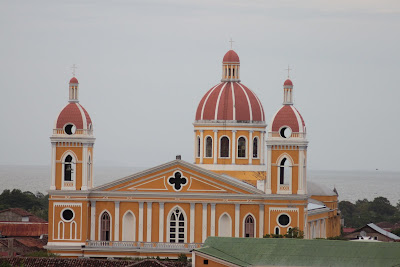
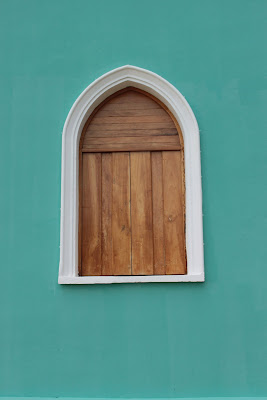
Scott and I were talking about how it's funny the things that your memory latches onto when you remember an experience. Sure, I will always remember our swim through Canon Somoto, our hike up Cerro Negro, tripping over stones in a bat cave, our beautiful walks up and down the Pacific coast. But, just sitting here reflecting on the trip, I find myself more so remembering the little pieces of everyday life that made that rainy, colorful country Nicaragua, the things that made Nicaragua feel like home. Things like the bright colors of the buildings, the buses packed well beyond their capacity, the swarming flies, Dina's smile as she brought us lunch, little Jona sitting on top of an upturned boat to greet us every morning, the children playing with rocks and empty plastic bottles, the language, the rain that came everyday at 2:00 p.m., the rice and beans that covered our plates, the farm animals that roamed the streets with the people, glass soda bottles with plastic straws. That is Nicaragua.

So here, in photos, are my most fond and vivid memories of Nicaragua:

.the people.


.the colors.


.the library.


.the landscape.


.the food.


Finally home,

HK